How to Add Meta Tag Information to Images
What Are Meta Tags and Why Would I Want to Add Them to My Images?
Meta tags are used to store information about the image, like a description, without modifying the image itself. This can be very valuable. Especially when trying to organize a large image collection. Once you have your photos digitized, you can tag photos with names of relatives, the event or location, and the date the photo was taken. You can then search your photo collection for a particular tag. There are a variety of meta tag standards you can use, including EXIF, XMP or IPTC. The most common meta tags are EXIF (Exchangeable Image File) meta tags utilized by digital cameras.
Meta tags are also used by cloud photo storage solutions, like Google Photos and iCloud Photos, to put your photos in chronological order. So before you upload your photos to the cloud, it’s best to tag each image with a date taken first.
Of course, before you embark on tagging your images, make sure you have a backup in case something goes wrong!
Software to Edit Meta Tags
There is a plethora of options when it comes to software to use to edit or view meta tags. Therefore, finding a solution that works for all operating systems and media formats can be a little tricky. One very powerful and cross platform option is ExifTool. The only problem (or feature) with ExifTool is that it is a command line utility. Which means it has no graphical user interface, aka a GUI. That can make it a challenge to use for the average user. Fortunately for both Mac and Windows users, there are GUIs available!
Windows users can use the official ExifTool GUI, which this guide will highlight.
Mac users can use a different GUI called SetEXIFData which includes a copy of ExifTool as part of its installation and has similar functionality.
Install ExifTool GUI for Windows
First you will need to Download ExifTool and then you will need to Download ExifTool GUI
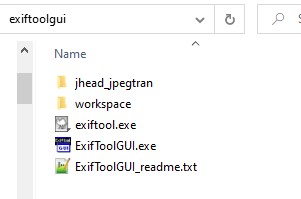
Extract both zip files and combine the contents of each zip into one folder. Rename exiftool(-k).exe to just exiftool.exe.
In the end you should have a folder that looks something like this:
Using ExifTool GUI for Windows
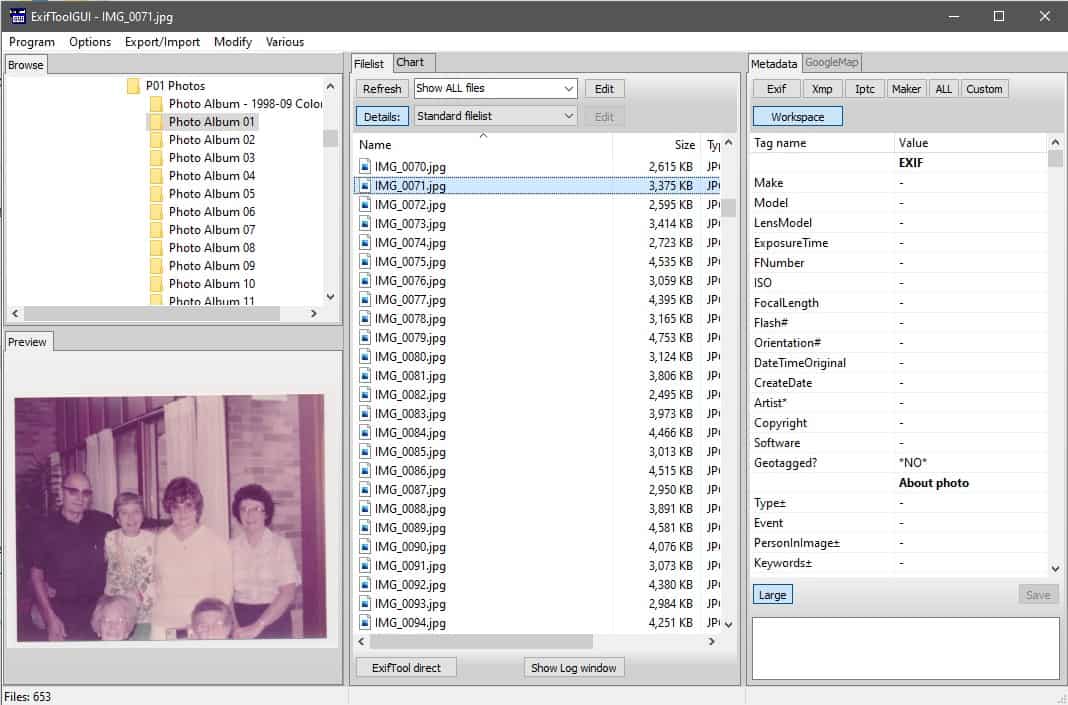
Once you have everything extracted in a folder, you can run the ExifToolGUI.exe and you should see an interface like this:
Modify EXIF Tag
To modify an EXIF tag, navigate to the images you would like to tag, select the image(s) you would like to tag and then on the right side, click the tag you would like to edit.
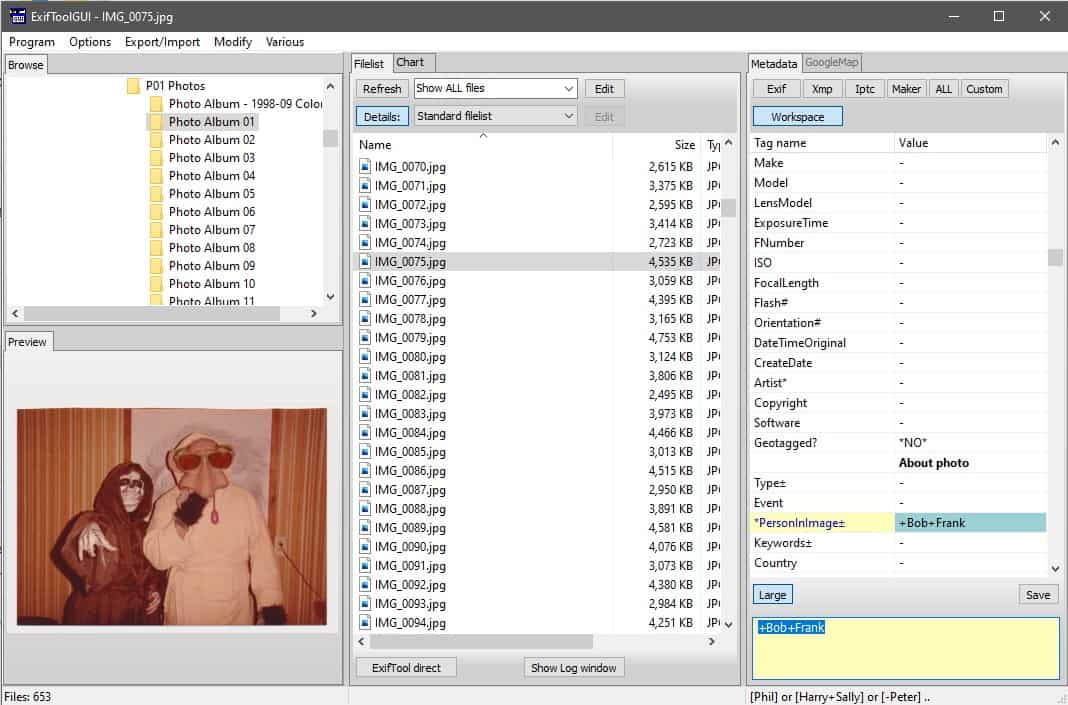
Then click the text field on the bottom right corner. If you would like a larger text field to type in, click the ‘Large’ button and that will expand the text field. Then type in a new value for the tag and hit Enter. The new tag values should show up as yellow; pending a final save.
To add values as a list, prefix the value with a + sign. To remove a value from a list, prefix the value with a – sign. For example, to add Bob and Frank to the PersonInImage tag, enter in a value of +Bob+Frank, hit Enter and Bob and Frank will be added to the tag and yellow.
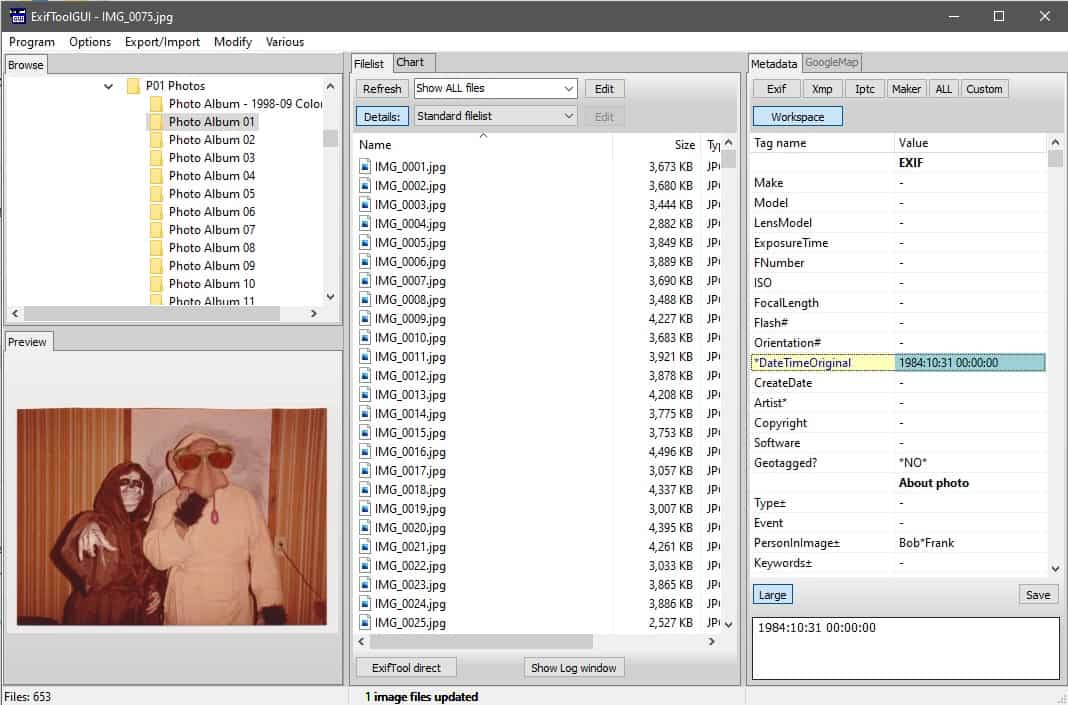
Once you’ve modified all tags you would like for the image(s), click ‘Save’ to write the pending tags into the file(s). If there is an error with the saving of the tags, a message will pop-up informing you. This will usually happen because of a malformed date format.
Dates and Specific Formatting
In order to insert a date and time into an EXIF tag, the date needs to be formatted in a very specific way.
Dates need to be formatted as YYYY:MM:DD HH:MM:SS
For example, to tag a photo for Halloween 1984, you can use a value of 1984:10:31 00:00:00
If you ever forget, ExifTool GUI will give an example of the format to use on the status bar once you click in the text field in the bottom right.


