Preserving Memories: How to Handle Your Digitized Media on USB Flash Drives
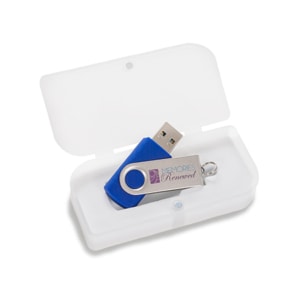
In today’s digital age, USB flash drives have become a convenient way to store and share your most precious memories, whether they are photos, videos, or other digitized media. At Memories Renewed, we provide USB flash drives as a reliable and portable solution for delivering your digitized memories. Here’s everything you need to know about handling your USB flash drive, copying files to your computer, and understanding drive formatting.
How to Copy Files from a USB Flash Drive to Your Computer
On a Mac:
- Insert the Flash Drive
Plug the USB flash drive into one of your Mac’s USB ports. If your Mac has USB-C ports, you may need to swivel the flash drive around and use the capped USB-C port. - Open Finder
Once the drive is connected, it should appear in the Finder sidebar under “Locations.” Click on the drive to view its contents. - Select and Copy Files
- Select the files or folders you want to transfer.
- Right-click and choose “Copy,” or press
Command + C.
- Paste Files to Your Hard Drive
- Navigate to the location on your hard drive where you want to store the files.
- Right-click and choose “Paste,” or press
Command + V.
- Eject the Drive
Before unplugging the drive, eject it by right-clicking its name in Finder and selecting “Eject.”
On Windows:
- Insert the Flash Drive
Plug the USB flash drive into one of your computer’s USB ports. If your PC has USB-C ports, you may need to swivel the flash drive around and use the capped USB-C port. - Open File Explorer
Open File Explorer and look for the drive under “This PC” or “My Computer.” - Select and Copy Files
- Highlight the files or folders you want to copy.
- Right-click and choose “Copy,” or press
Ctrl + C.
- Paste Files to Your Hard Drive
- Navigate to the destination folder on your computer.
- Right-click and choose “Paste,” or press
Ctrl + V.
- Safely Remove the Drive
To avoid data corruption, safely eject the drive by right-clicking it in File Explorer and selecting “Eject.”
Understanding Flash Drive Formatting
Default Format: FAT32
- Why We Use It: FAT32 is compatible with almost all devices, including computers, game consoles, and smart TVs.
- Limitations: Files cannot exceed 4GB in size, which is often insufficient for high-definition video files.
When to Use exFAT
- Why We Use It: exFAT supports larger files and is more suitable for flash drives larger than 64GB. It is also compatible with both Mac and Windows operating systems.
- Limitations: Some devices, especially older smart TVs, do not recognize exFAT drives.
What You Need to Know
- If your drive contains files larger than 4GB (such as high-quality videos), it will be formatted as exFAT.
- For smaller drives or if compatibility with older devices is critical, the drive will be formatted as FAT32.
Best Practices for Viewing Files on Other Devices
- Smart TVs: Most TVs do not support the exFAT format. If you plan to use your drive with a smart TV, you may need to reformat it to FAT32 and split large files into smaller segments.
- Backup First: Always copy the files from the USB drive to a computer or external hard drive as a backup.
- Use Media Players: For large files on exFAT drives, use a computer or a modern media player that supports exFAT.
Why It Matters
Your digitized memories are irreplaceable, and we want to ensure they are easily accessible and safely stored. Understanding how to copy your files and handle USB flash drives will help you preserve these precious moments for years to come.
If you have any questions about your USB flash drive or need help accessing your digitized media, don’t hesitate to contact us. At Memories Renewed, we’re here to help you protect and enjoy your memories.

